After playing with React Native for two weeks, I realized that the development tools are not stable yet — particularly on Windows — in that, I keep receiving platform-level errors and compatibility issues. I reckon that is because there are too many layers in the stack. But anyway, as a result, I cannot focus on the development of my project.
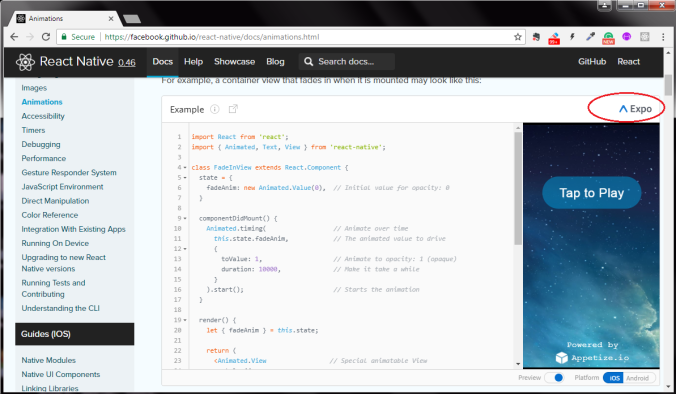
I recently start trying this tool, called Expo, in hope that it can remove the obstacles in my way. If you pey attention, you would have already found it from React Native’s official site, it is used to host and demo the snippets of React Naive code in the pages of documents.
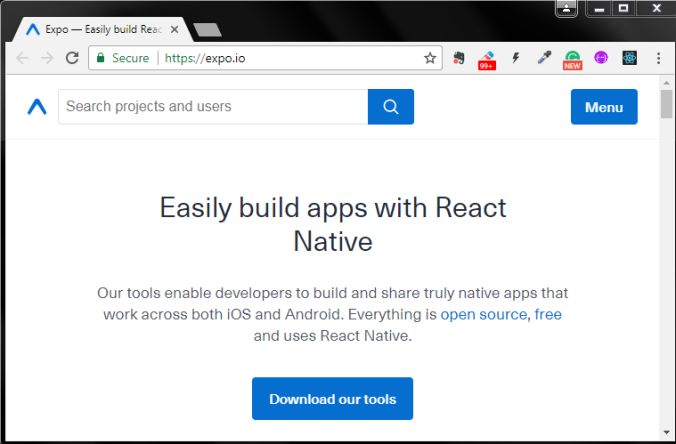
Here is its website:
It does support online compiliation and building, and you can run the project in the wrapper app of Expo on your mobile device.
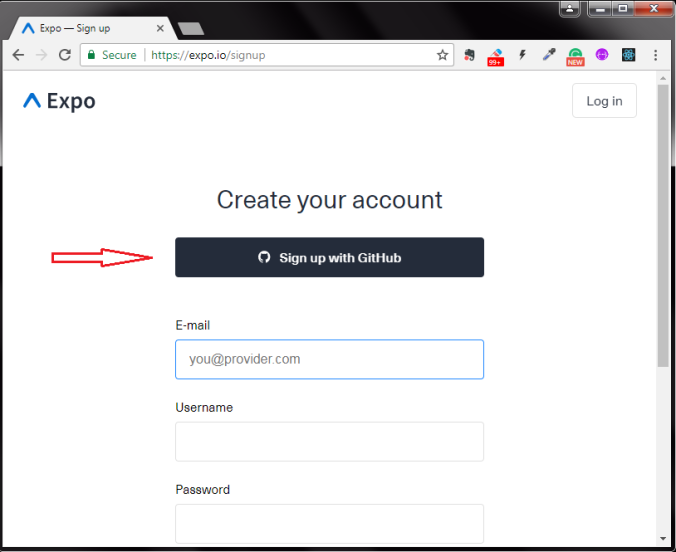
Before you can start, you really need to sign up.
I signed with Github account.
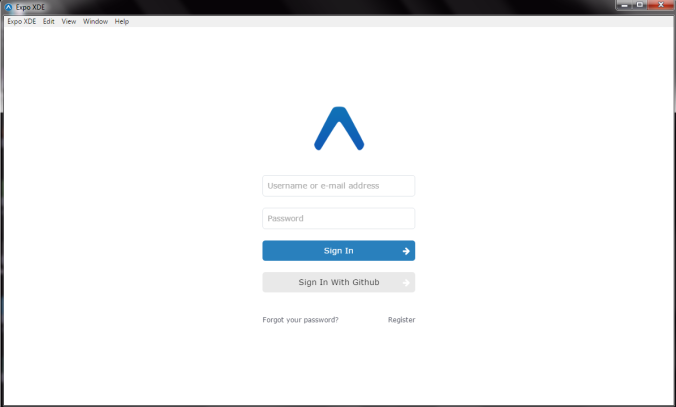
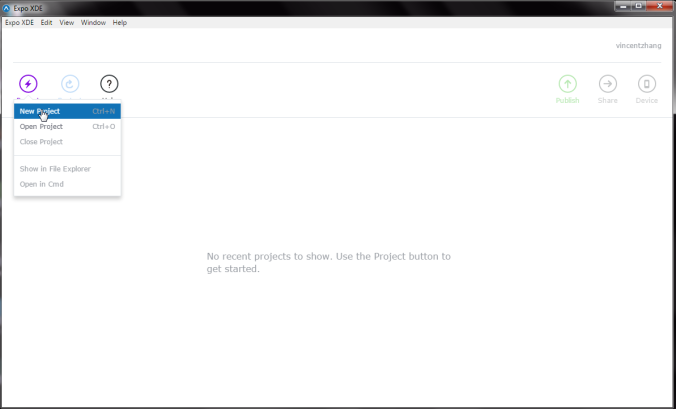
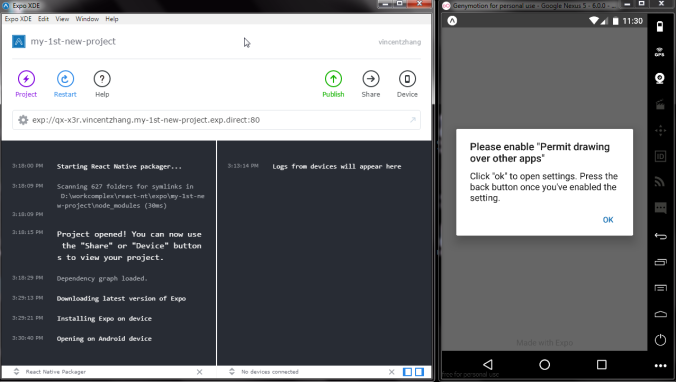
After installation, the first start-up of the XDE looks like:
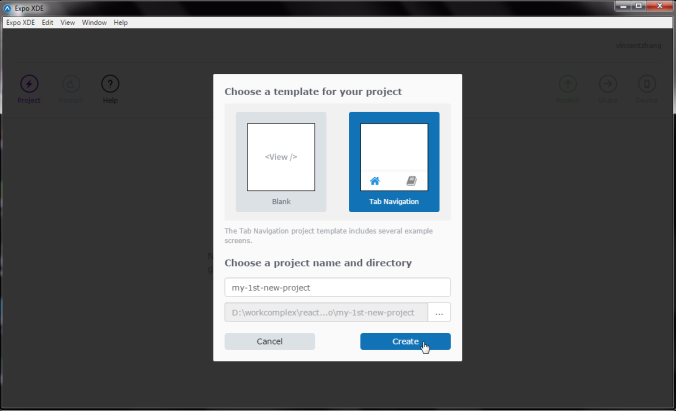
Log in, create a new project:
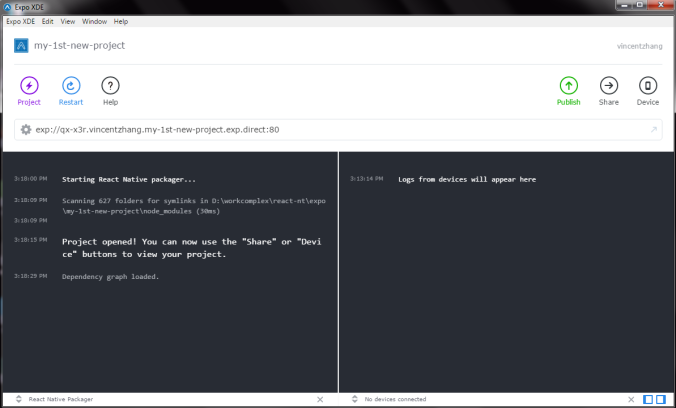
The left pane is called packager console, sort of the counterpart of the cmd window where you run React Native CLI.
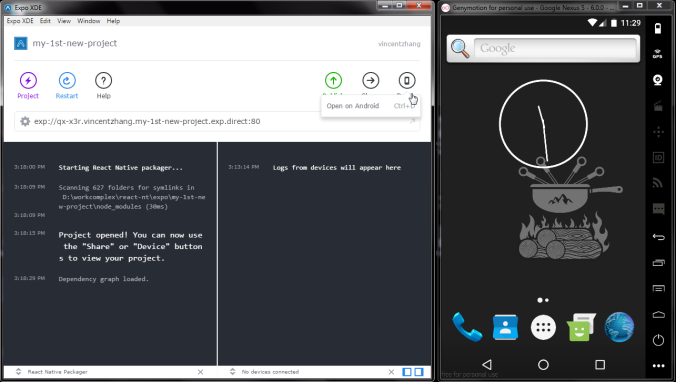
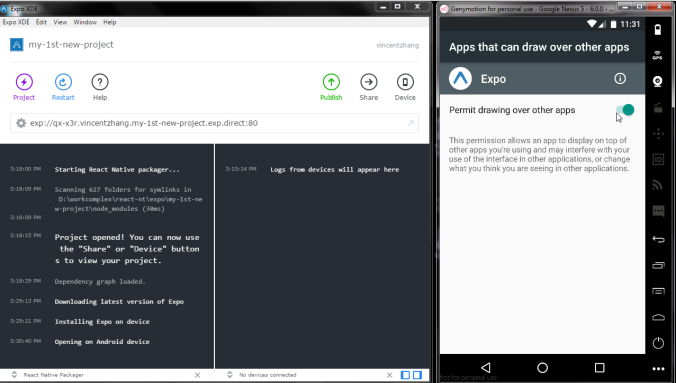
Launch Genymotion, and afterward the option of Open on Android will be available:
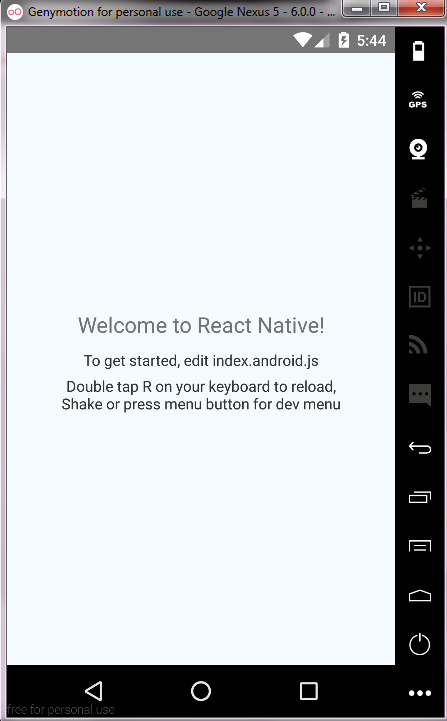
Run on Android, for the first time, you would see:
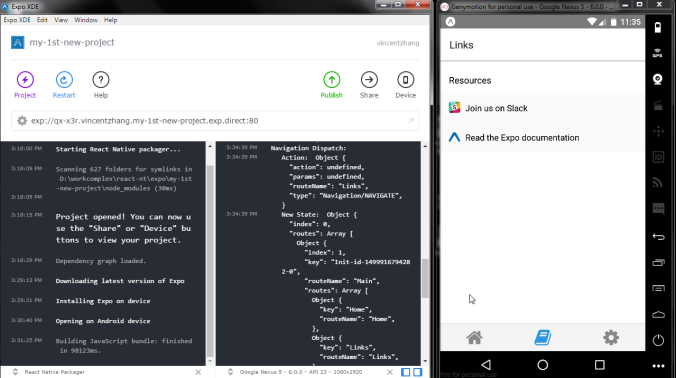
Now you can play with the app in the Android emulator:
The right pane is a console to display device logs. The messages are displayed after I navigate to another tab, and they look like the data kept in the store of Redux.
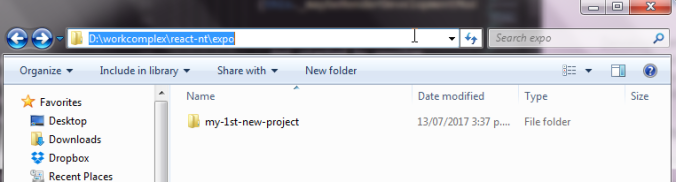
The new project’s path is under the installation directory of Expo
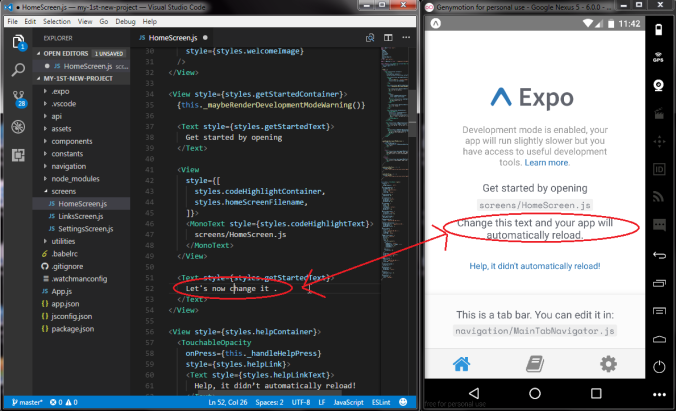
Open the root folder in VS Code, and change the content of the home screen:
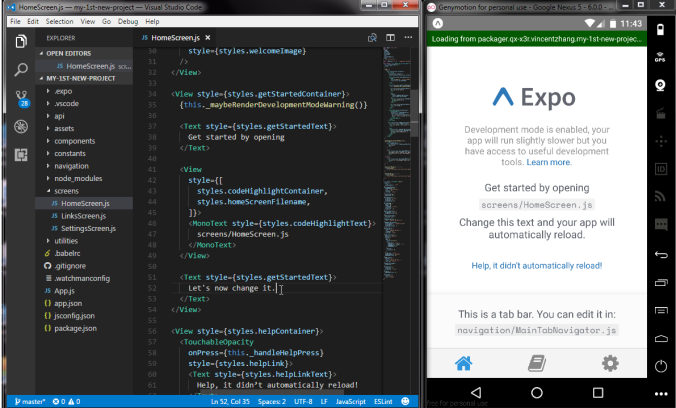
And saving the changes will automatically trigger rebuilding:
You can also download Expo app on your mobile phone, and run this project from it, which I will go over shortly.
Unfortunately, I have not figured out how to use the standalone React Developer Tool. And I have not found out the correct way to inspect React Native components in Chrome DevTool.
All I can do now, is output some debug information in the console of Chrome browser. I followed the official instructions.
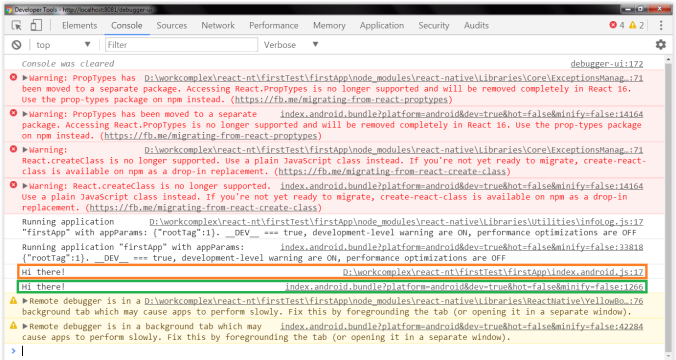
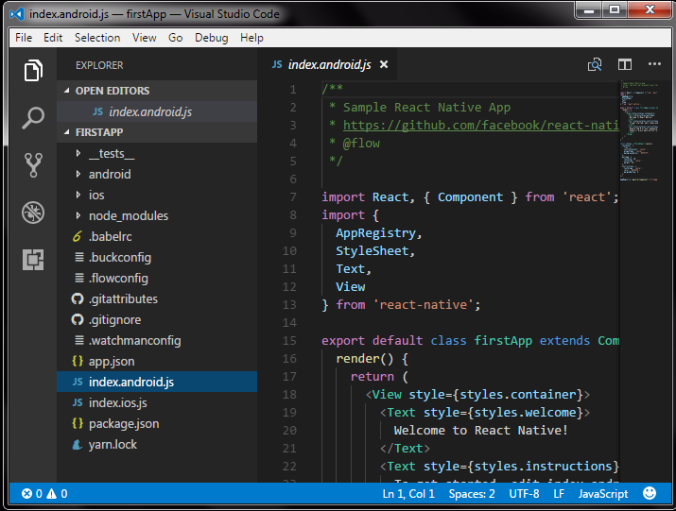
Beforehand, I changed the source code of the sample app created by react-native init. Open index.android.js, add one line:
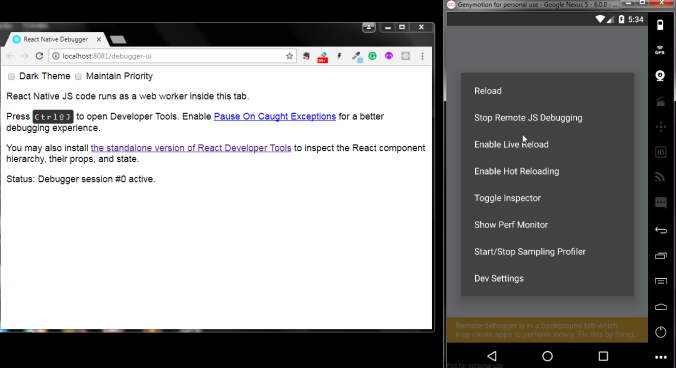
Open the developer menu by pressing CTRL+M in the emulator, choose Debug JS Remotely, that will open a tab in Chrome:
Press F12 to open up the DevTool of Chrome:
Yeah, we can see the log information we wrote, plus the reddish warnings, splendid.
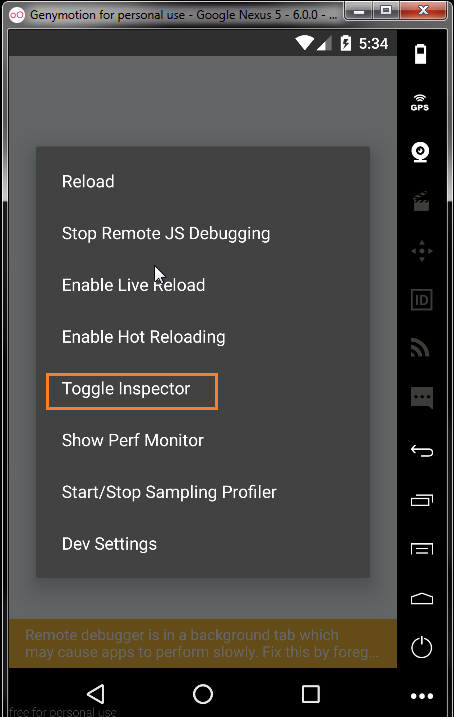
Bring that Developer Menu again, choose Toggle Inspector,
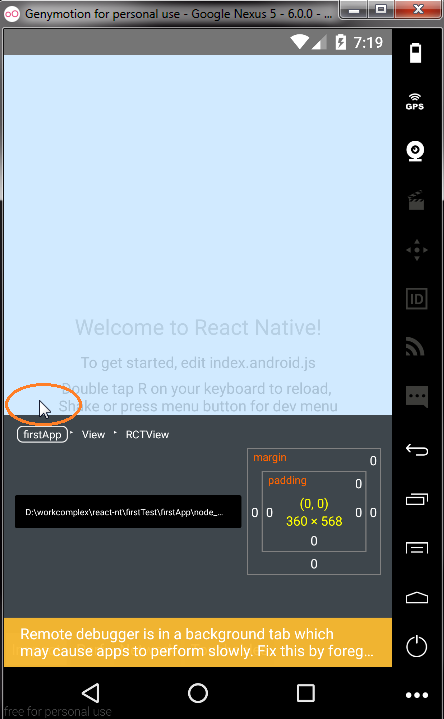
You would see:
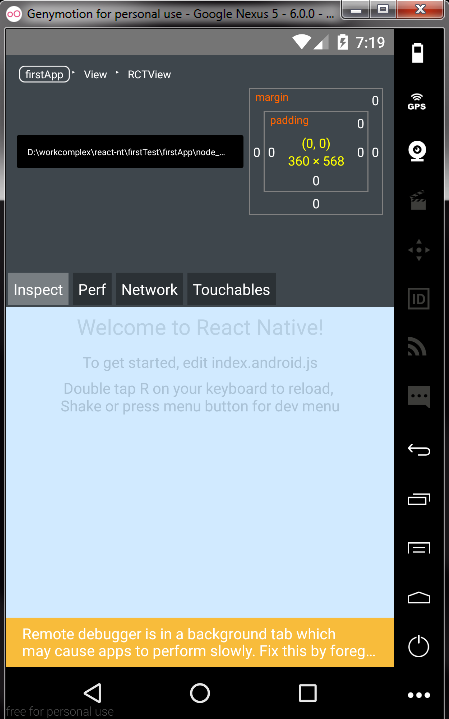
And click the area slightly right above the inspector (but not on text) will change the view as (not sure if it works for everyone the same way, have not found any official docs on that):
Connect To React DevTool
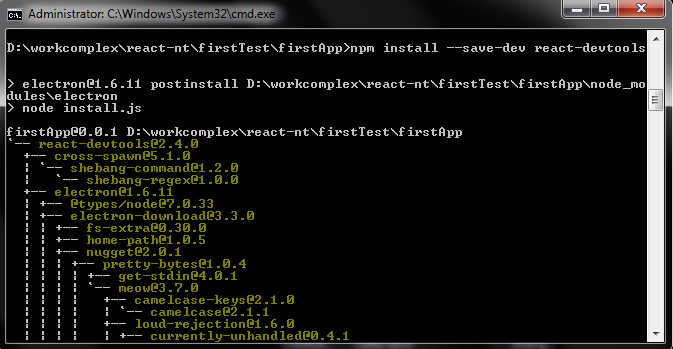
According to its official doc, we can install it locally, so I run npm install –save-dev react-devtools on the project root directory.
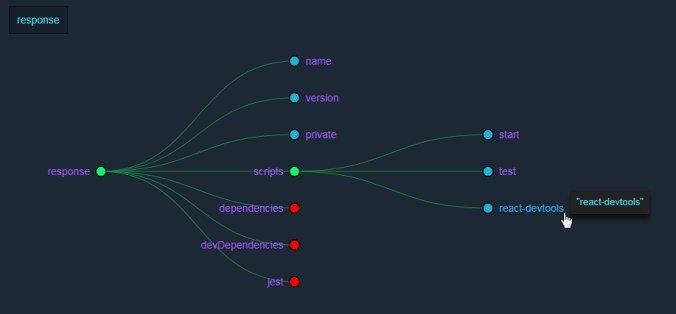
And update the package.json, adding react-devtools, it now looks like (displayed in a visualized json viewer):
In the last blog, we have already setup Android Studio 2.3.3 and Reactive Native dev tools, and successfully run the startup project in the emulator of Android Studio.
Setup Genymotion For Emulation
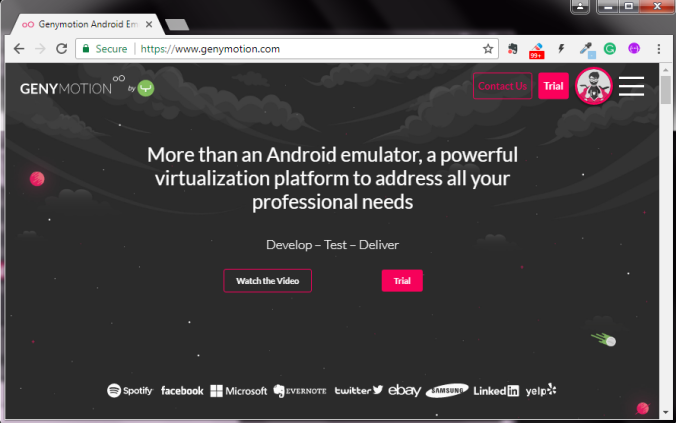
The default emulator which comes with Android Studio is laggy and slow, and even Google recommends Genymotion as the emulator for Android app development. Before you start, you really need to sign up (and activate your account) on its official website:
Otherwise, you won’t be able to finish this setup. Since its home page changed, the download link of the free version seems to be a secret path now, anyway, it’s here.
Basically, I took some video tutorials on youtube as the reference, but none of them covers everything:
You can find a lot out there, but most of them are exactly the same as the first one.
Let’s go through the steps.
Step 1: Install & configure Genymotion
If you have never installed Genymotion or Oracle VM VirtualBox before, you can refer to any of the tutorials on youtube, and skip the rest of step 1, jumping to step 2 straightway. Just keep in mind that you should choose the installation file with VirtualBox – the bigger one.
However, if you have installed Genymotion, like me, and it does not work with the updated Android Studio. In that case, if you don’t want to wipe everything and re-install them, you can follow my instructions at the end of the blog.
Step 2: Configure Android Studio & Genymotion
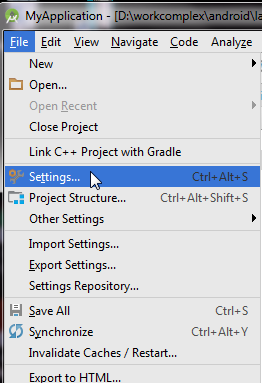
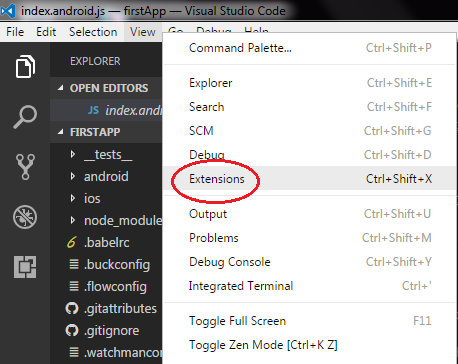
Open up AS, go to menu: File->Settings…
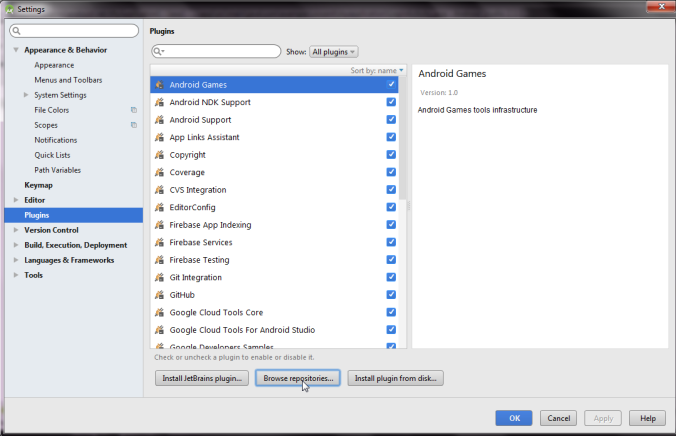
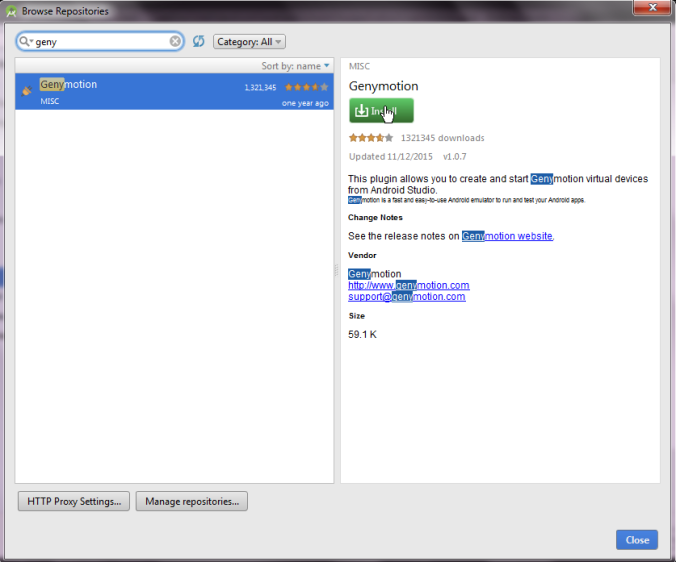
In the panel, go to ‘Plugins’, and click ‘Browse repositories’
Type in ‘genym…’ to search the plugin for it, and install it:
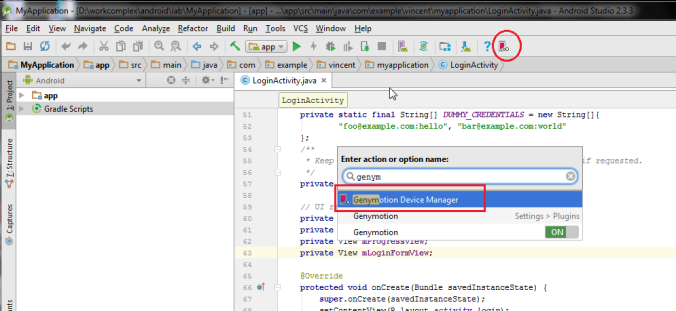
After installation, restart Android Studio, and you would see the button of Genymotion, besides, you can also press CTRL+SHIFT+A and type in genymotion to launch Genymotion device manager:
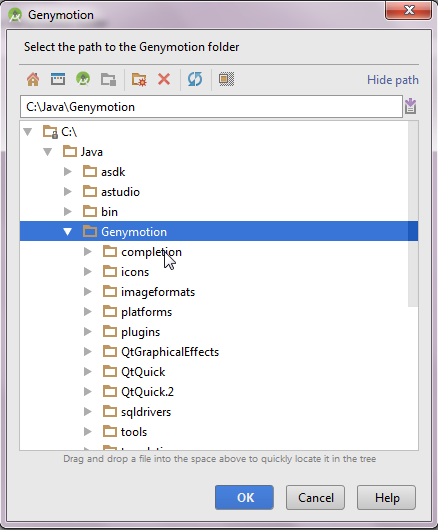
As I said above, I installed Genymotion before, and I just re-installed AS, so AS is not aware of Genymotion anymore, therefore in my case, after opening up the Genymotion Device Manager, I saw this dialog:
It asks me to provide the installation path of Genymotion:
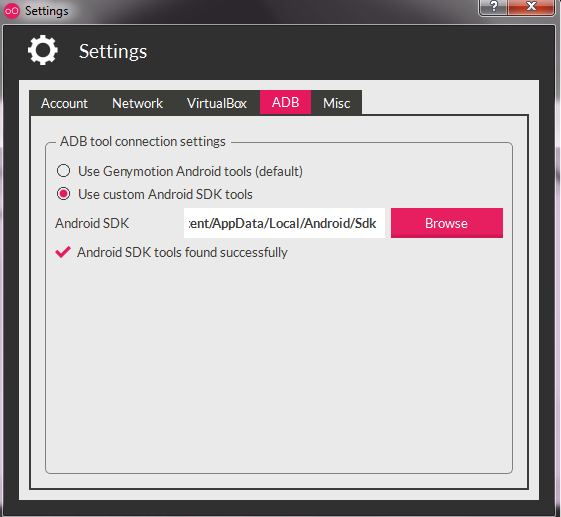
If you install Genymotion after AS, you won’t see that and don’t need to bother with that. We have done with AS settings, and now go to the setting of Genymotion, we also need to update the Android Studio SDK path in Genymotion’s setting panel:
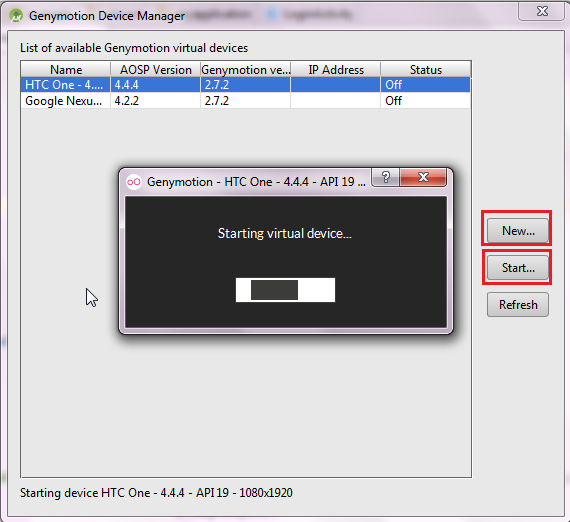
Now, we can create and start device from Genymotion Device Manager, to test it, I just pick one from the previously created devices, and srart it:
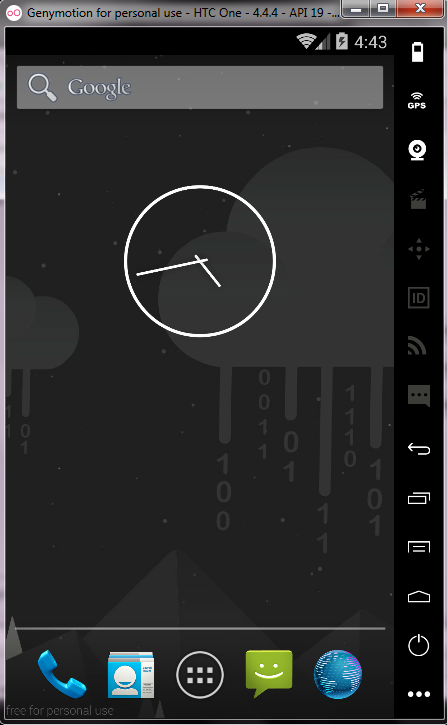
It starts successfully:
And if we run the Android native app from Andriod Studio (remember I created one when first time opening up AS), we can choose the running device now, which means AS are connected to the virtual devices:
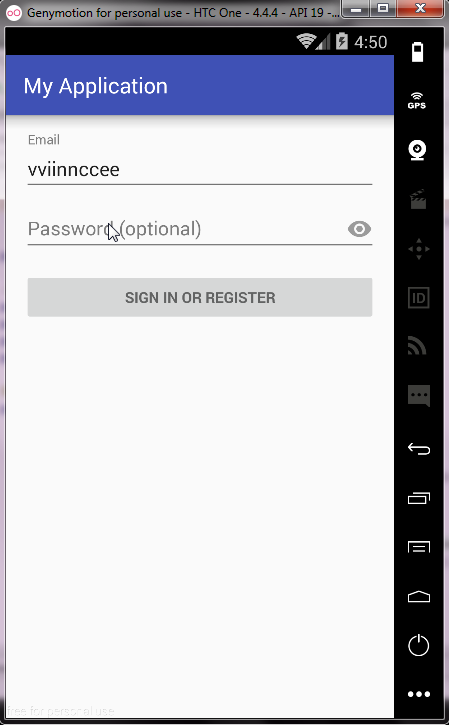
Go ahead and run the native sample app:
Oops, too buggy.
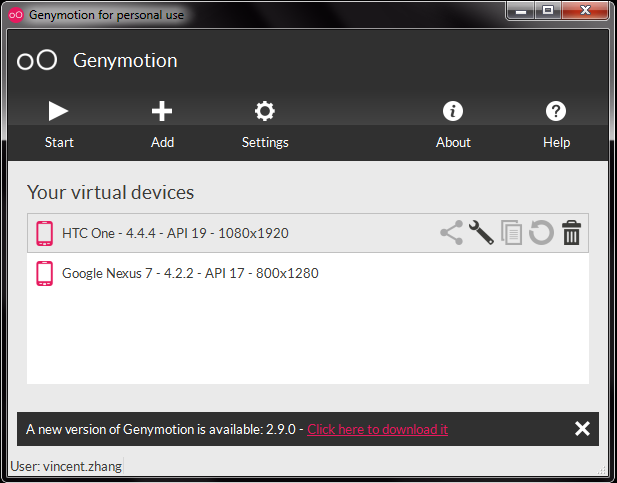
However, the HTC One device runs Android 4.4.4, which seems not to support React Native, remember from the last blog that we have installed Android 6 particularly for React Native support.
So, we need to create a new device with Android 6. Let’s put the details of that in the next step.
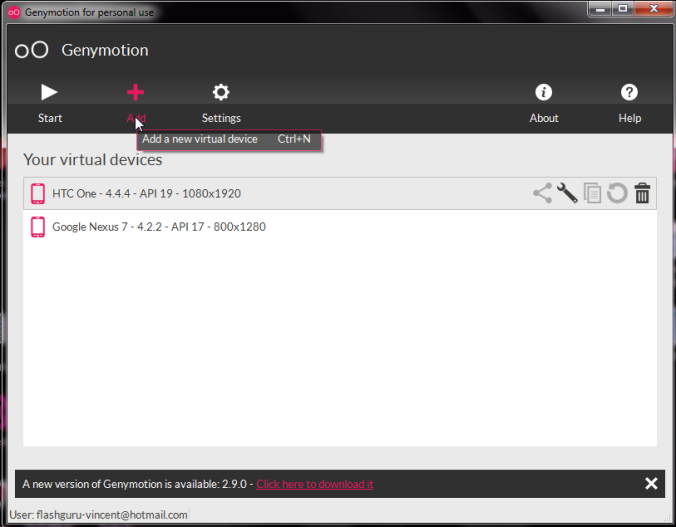
Step 3: Create virtual device
I did that in Genymotion its own window, rather than the manager launched from AS. Hit ‘Add’ in the panel:
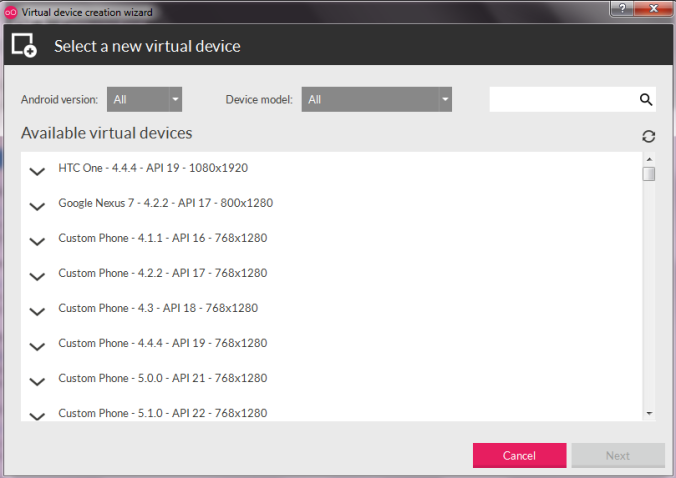
That brings up the setting panel:
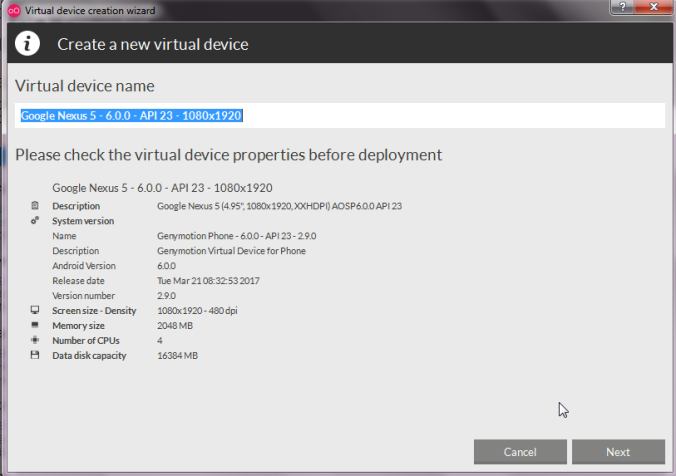
This is where your account comes into play, you need to log in an activated account to be able to see the of the available devices shown in the above screenshot. I chose Google Nexus 5, which runs Android 6.0.0:
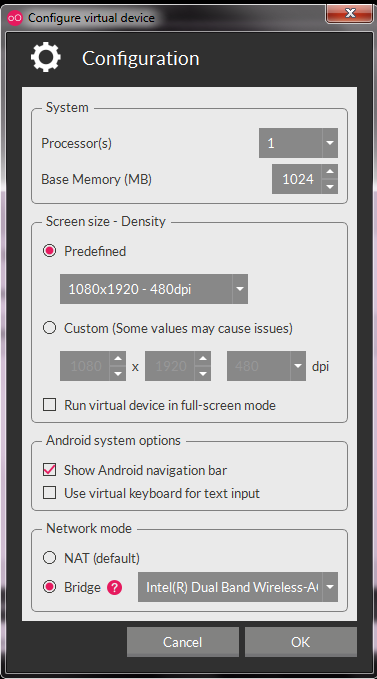
Now change its settings as:
At least in my case, it is necessary to change the Network mode to Bridge. I also reduced the number of CPU processors and memory as my computer is sort of lame.
Step 4: Run React Native in Genymotion
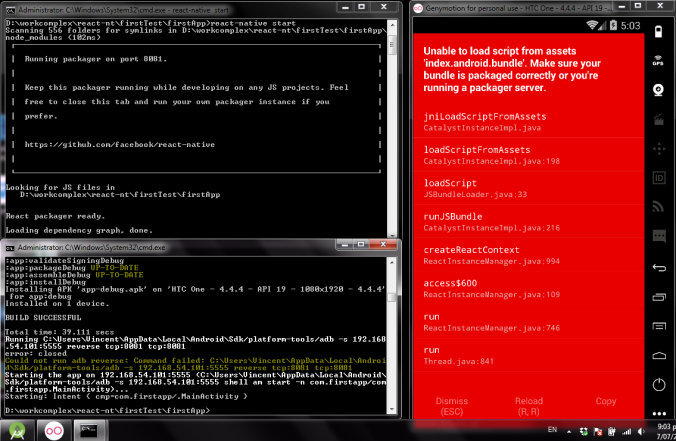
Let’s launch Genymotion Device Manager from Android Studio, and start the newly created Google Nexus, after few minutes, it is all setup. With those things in place, let’s run the React Native project in the same way as I described in my last blog, and what happened was:
WHAT????
OK, the solution for me was pointed out here, thanks to Daniel Masarin, he has the credits.
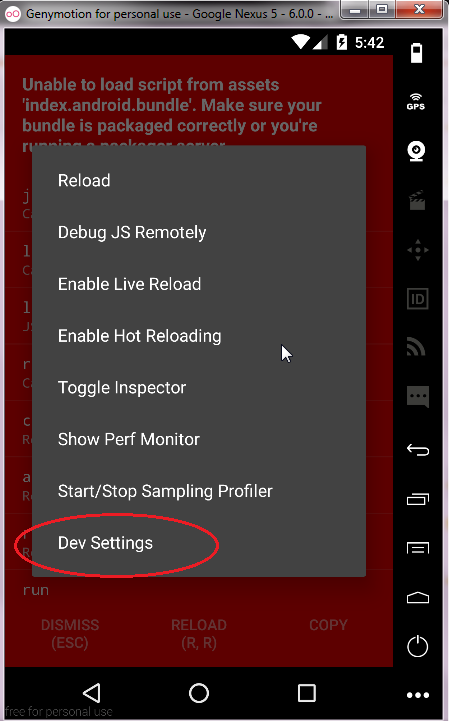
Press CTRL+M, in the panel, click ‘Dev Settings’:
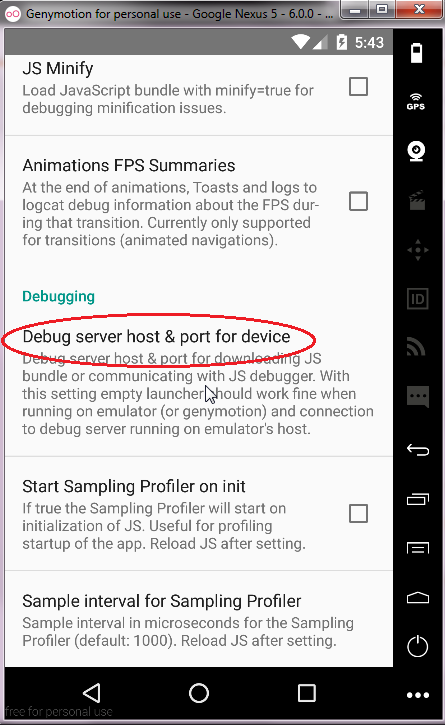
And you will see:
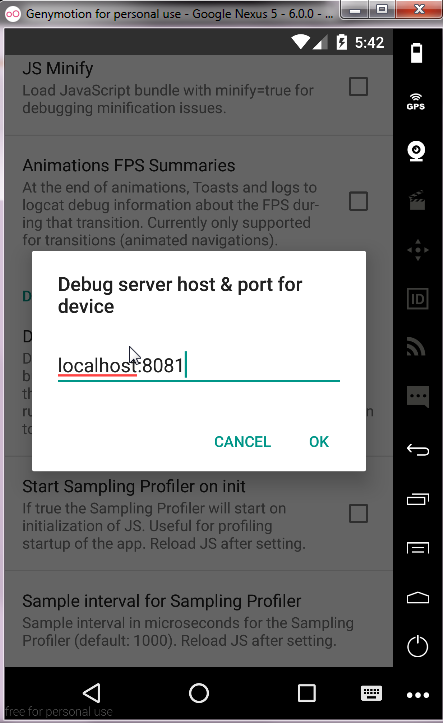
Look for ‘Debug Server Host & Port for device’, click on it, and type in localhost:8081:
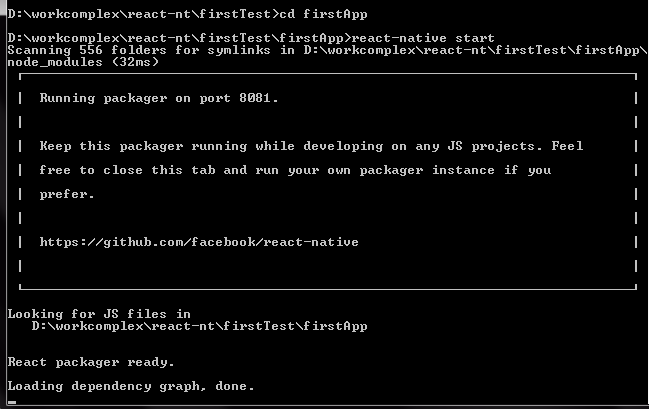
If you are wondering where this port number comes from, remember from the last setup blog that, when running react-native start, you would see:
┌───────────────────────────────────────────────┐
│ Running packager on port 8081. │
│ │
│ Keep this packager running while developing on any JS projects. Feel │
│ free to close this tab and run your own packager instance if you │
You need to stop the React Native building service, and run the commands react-native start and react-native run-android again in the two command prompts respectively to make it work:
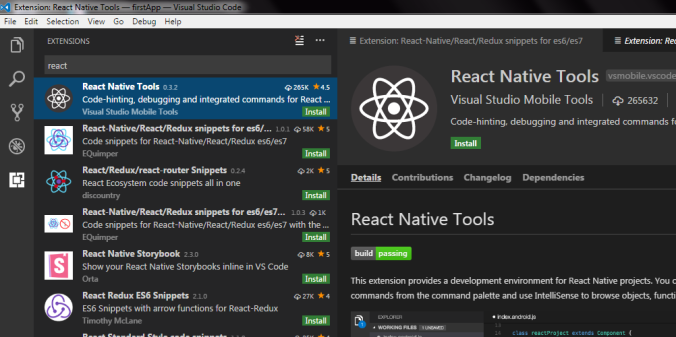
Setup VS Code For React Native
Nothing much in this section, just some handy plugins.
Appendix: Fix previously created virtual devices in Genymotion
I have a previous version installed on my Windows, it is a little bit old.
Open it up:
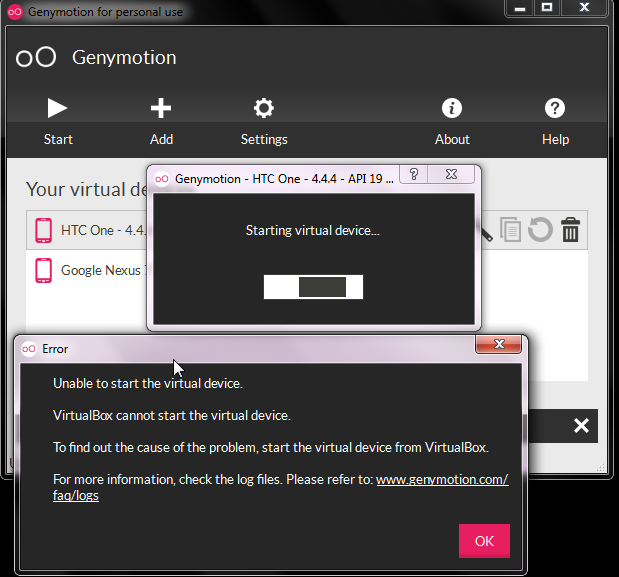
Try to start the HTC One device, it fails:
According to the second video, you can just reinstall VirtualBox to fix it. I didn’t do that, because it used to work, and it probably has something to do with the settings as I have re-installed my Android Studio two days ago.
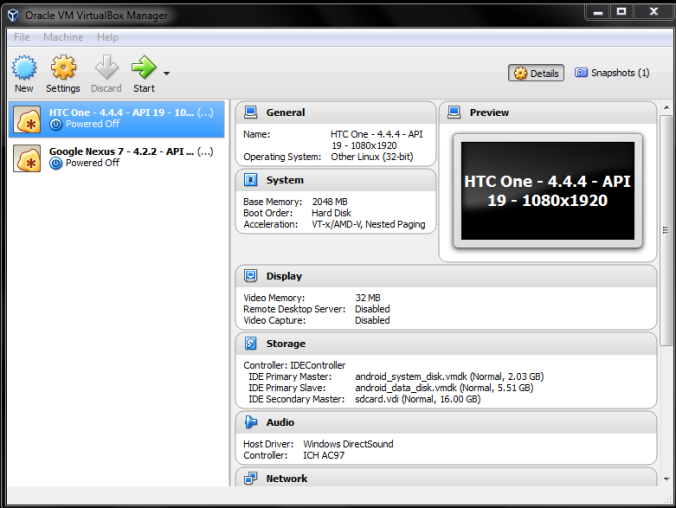
Open up VirtualBox:
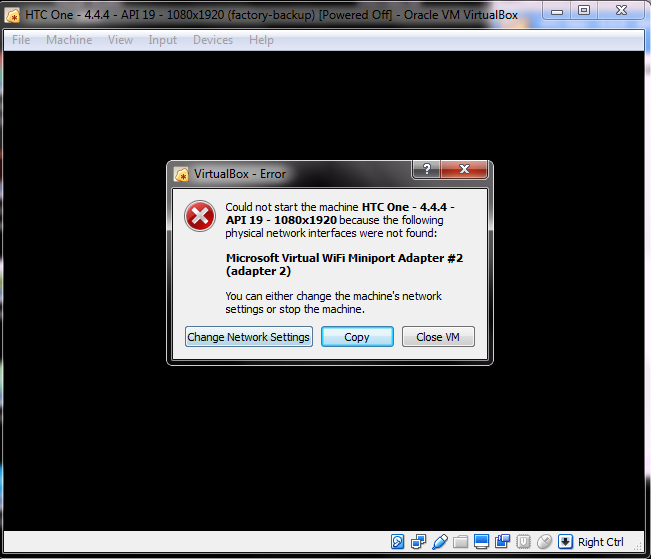
Start the HTC device:
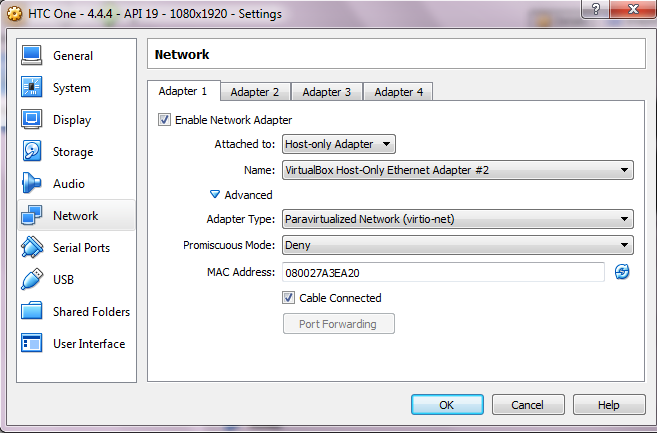
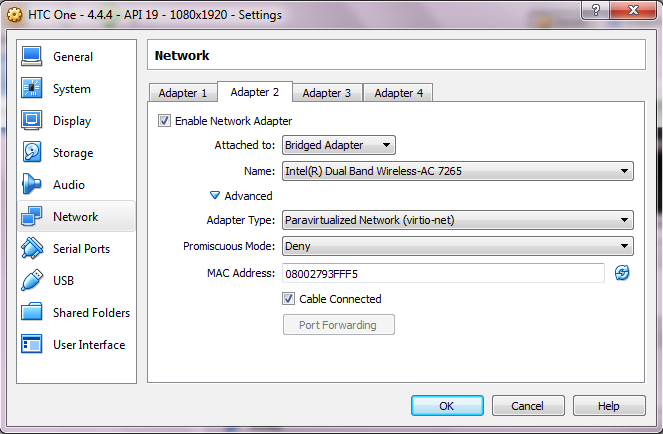
The problem is the Network setting, open up the setting panel, go to network tab, the below screenshot shows my settings for Adapter 1:
And Adapter 2, it is very important to select the wifi adapter on your computer so that the virtual device can access the Internet:
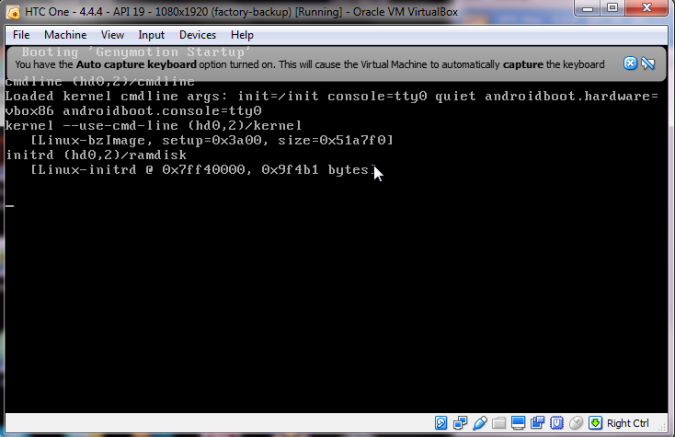
Start the device again from VB:
This command line thing kept going for over 10 minutes at least, and finally displayed nothing but a blank black screen, so I just closed it.
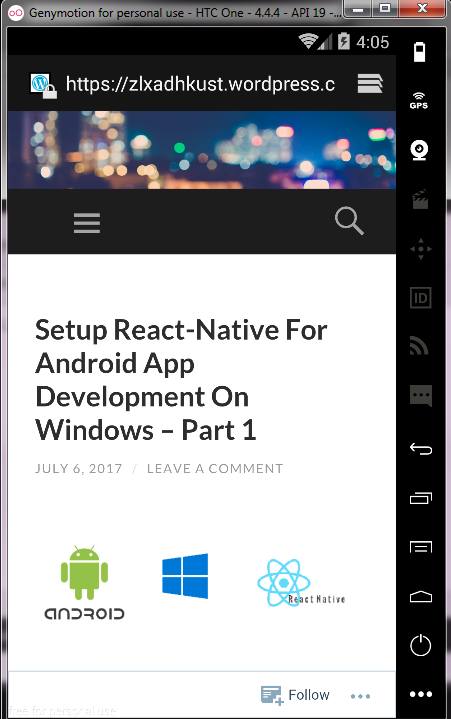
Re-start the device from Genymotion:
I can run it now, and I can access the internet as well:
Yeah, there you go.
As for the adapters and adapter types in the Network setting panel, you can refer to the links for details:
But unfortunately, none of them is up to date, some instructions are outdated, as things are constantly changing fast, that’s the reason I now am writing this blog. The date of writing is 6/July/2017, so if you came across this blog later than the date, you may find that things have changed again.
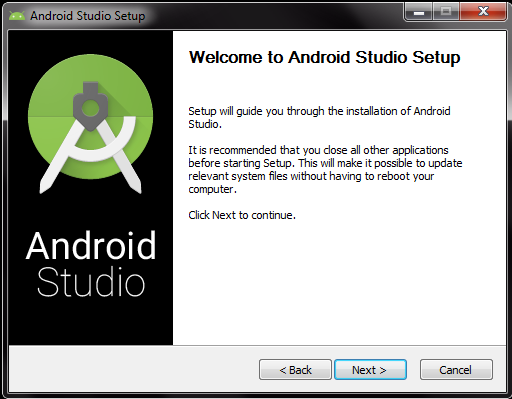
Step 1: Install Android Studio
I have Android Studio 2.1.x installed previously, but the latest version is 2.3.3. In order to update, you have to uninstall the previous one, and if you want to re-install the new version into the same directory, you have to clean up the directory, to make sure it is empty.
There is not much of Android Studio installation, you can refer to its official instruction.
After the initial launch, I created a new Android project, btw.
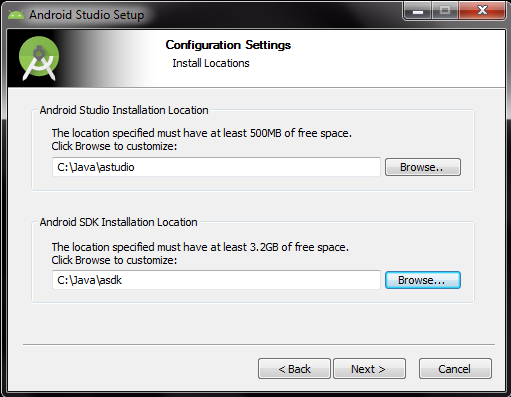
For those who re-install Android Studio like me, there is one thing to take note. If you specify another location for Andriod SDK installation other than the default one, like me:
In case the folder is not empty, the installation wizard will ignore that and install the SDK into the default path without telling you, which is:
C:\Users\YourName\AppData\Local\Android\Sdk
That’s what happened in my case, not so nice:(
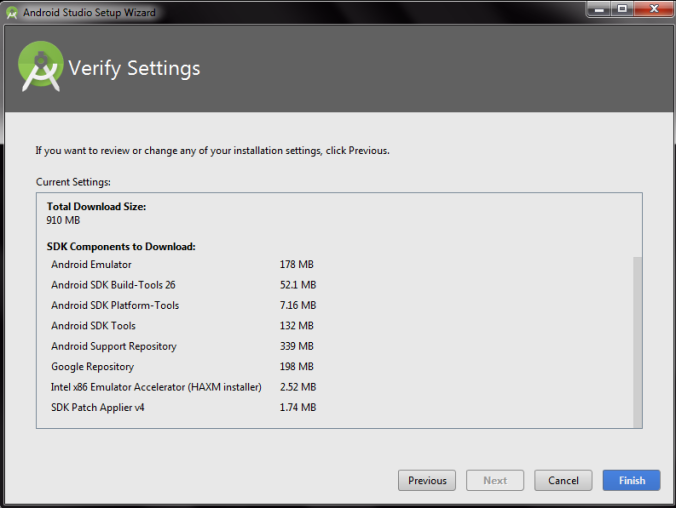
Step 2: Download the SDK
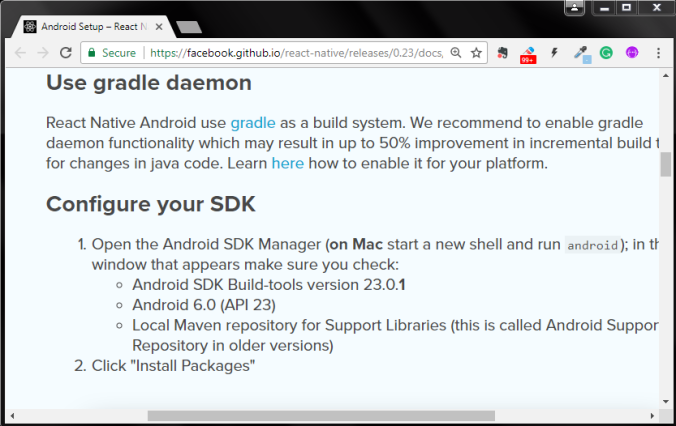
As for which packages we should download, we just need to reference to React Native’s official doc. If you come here a long time after the date of writing, check it first.
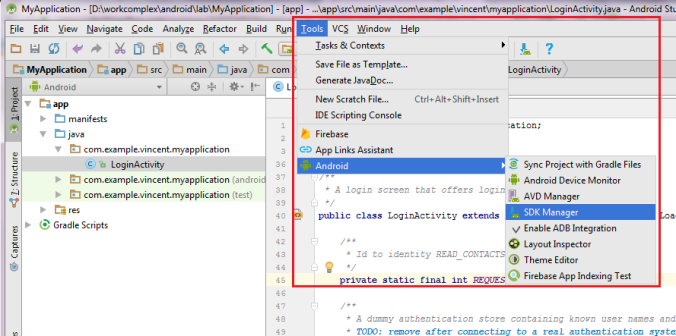
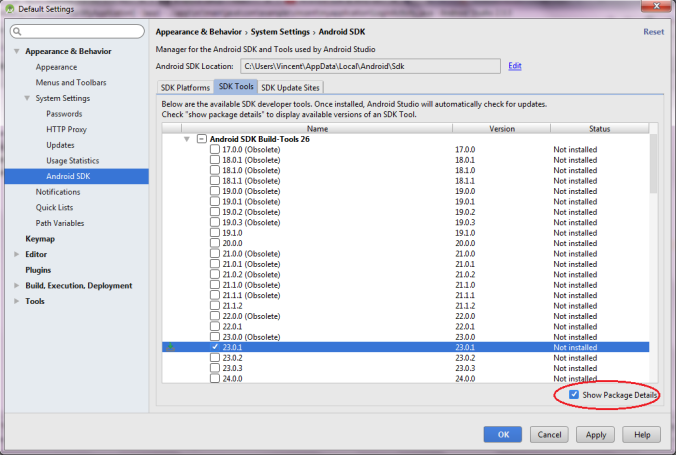
You can boost the SDK manager from the menu of AS:
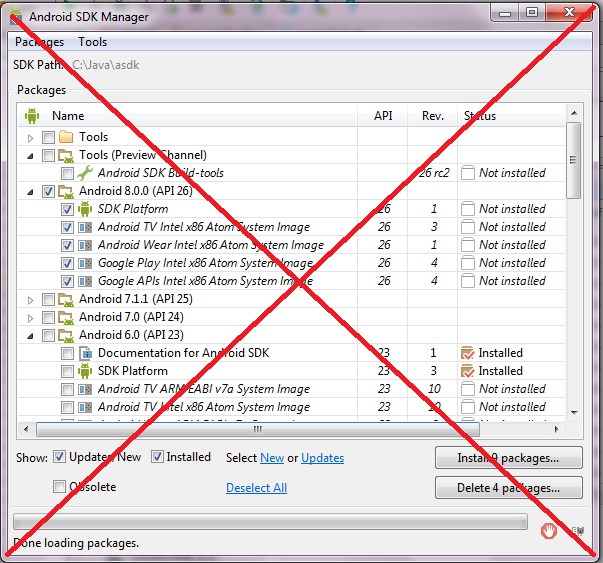
For those who have experience with previous versions of Android Studio, you may expect a standalone manager for this, like:
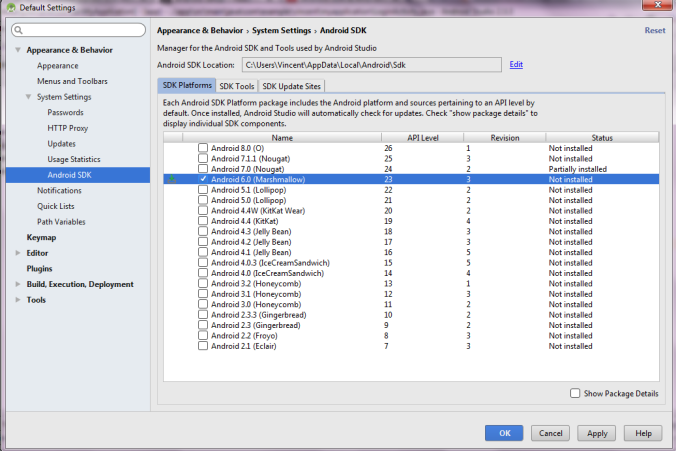
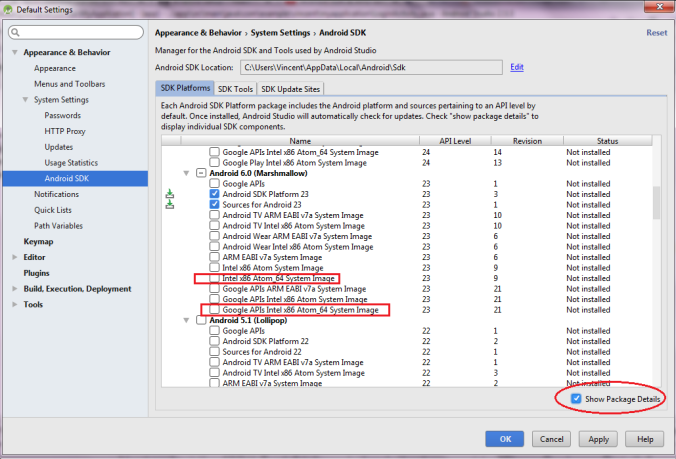
But it has been removed recently, from now on, you won’t see it anymore. Instead, you can tick the option of ‘Show Package Details’ in the new manager:
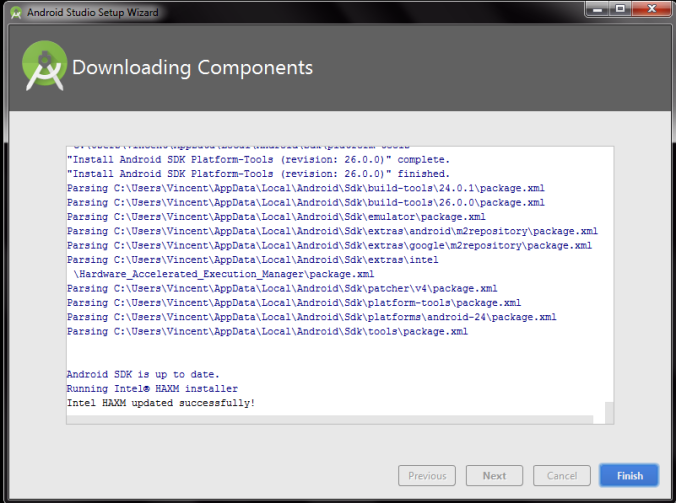
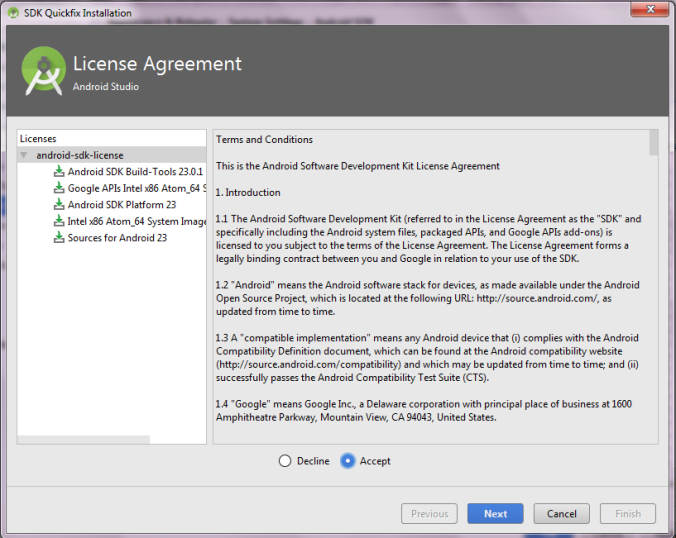
Select all the items as requested by React Native online doc, and install them.
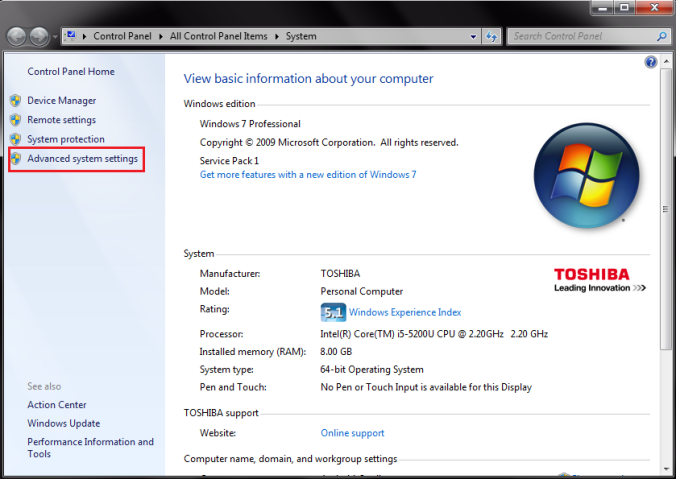
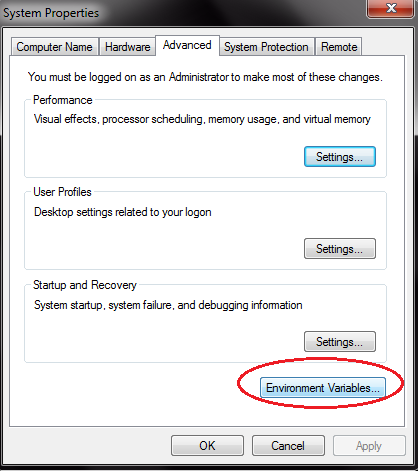
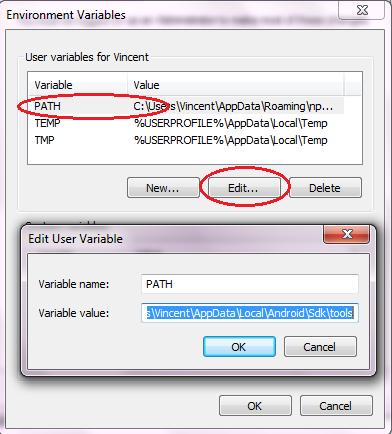
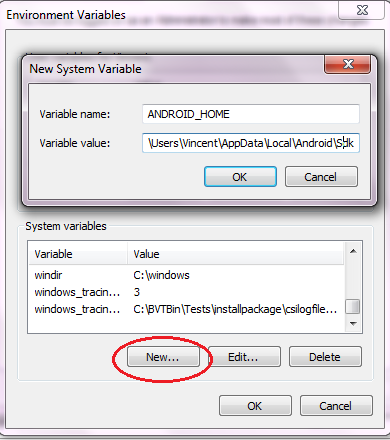
Step 3: Add environment variables
This is required by any development environment setup with Java technology, quite simple and straightforward.
I added two paths to PATH in User variable section:
First thing, practically speaking, you don’t have to set variable ANDROID_SDK_HOME, you can just leave it out. The default value will work unless you make some strange setting.
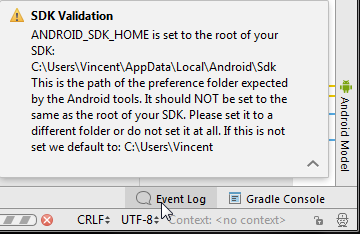
Secondly, please note that the value of ANDROID_SDK_HOME in my case is different from the one as shown in the video I mentioned above, which is exactly the same as ANDROID_HOME. That doesn’t seem to make sense to have two variables with same values, and as a matter of fact, you will get a warning if you do that when you start up your Android Studio after reboot, as shown:
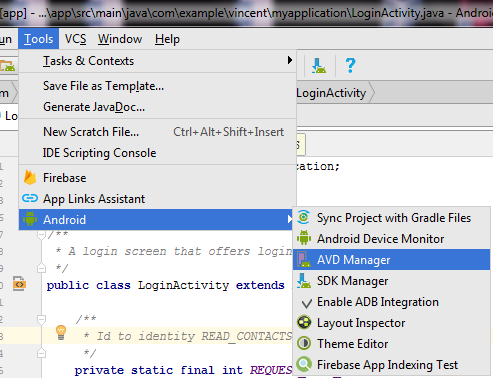
And as a result, you won’t be able to activate the AVD manager after rebooting your computer, if you have your ANDROID_SDK_HOME pointing to …\…\Local\Android\sdk.
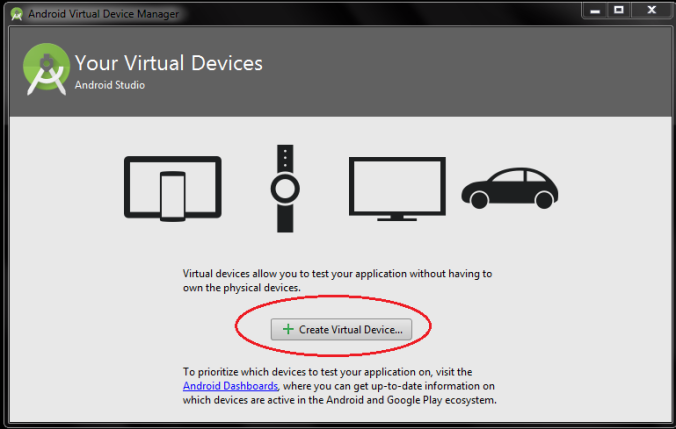
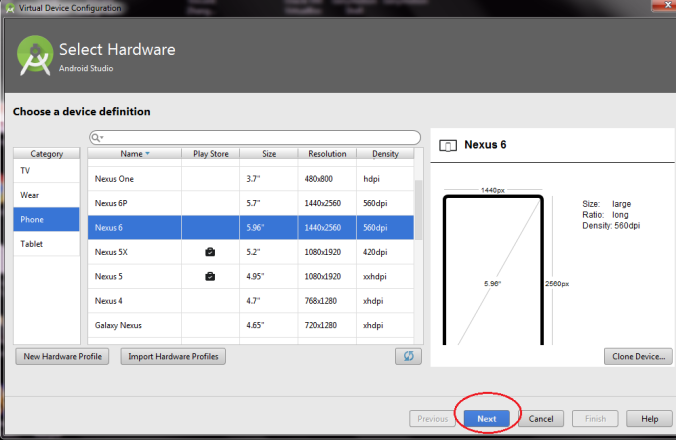
Step 4: Configure Virtual Device
In the below dialog, make sure you select Android 6.0 (again, this is up to the official doc of React Native, it may change later), and the correct version for your computer.
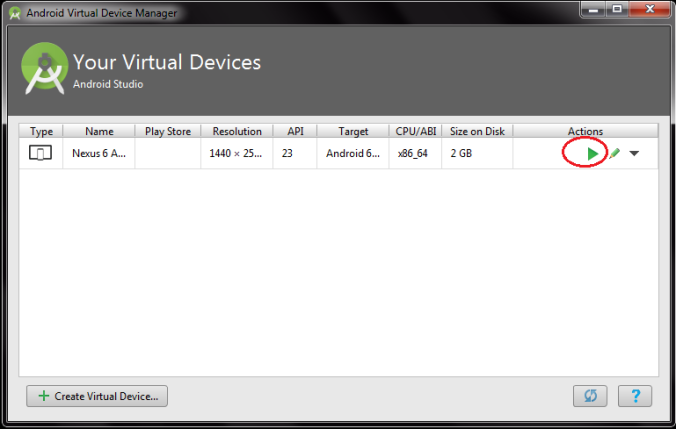
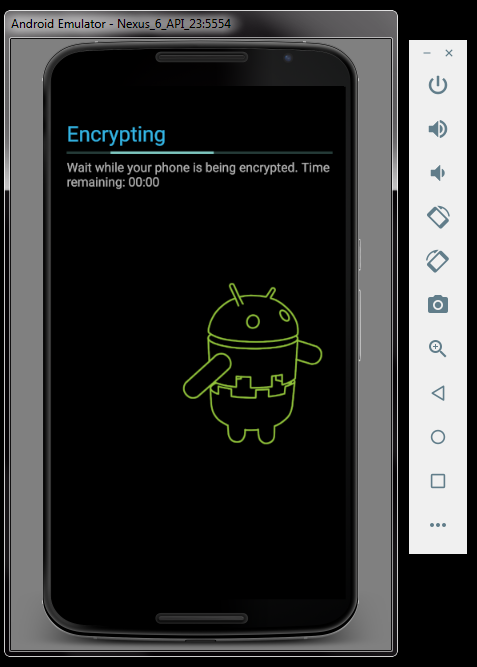
Start the virtual device:
After some sort of initialization like this (it took quite a few minutes in my case, depends on your hardware spec):
There we go!
The default VD which comes with AS is quite slow, so Google recommends Genymotion, I which will go over in the next blog.
Step 5: Install the packages/tools for React Native
Open the command line prompt of Windows, navigate to the directory where you would like to start your React Native journey. Run npm commands to install the packages that React Native has dependencies on (refer to docs):
I chose to install them globally, and they are installed into:
C:\Users\YourName\AppData\Roaming\npm
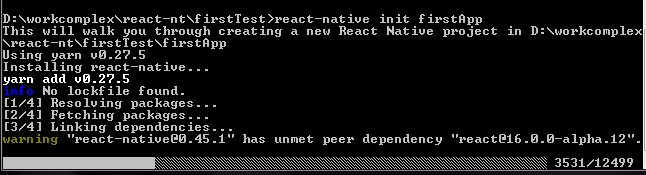
Step 6: Initiate a React Native project
With the virtual device running, run command:
react-nativeinityourProjectName
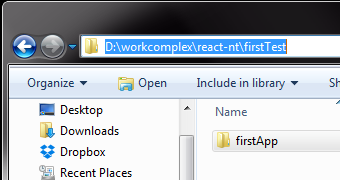
That takes a few minutes, and will create a folder with the name you specify:
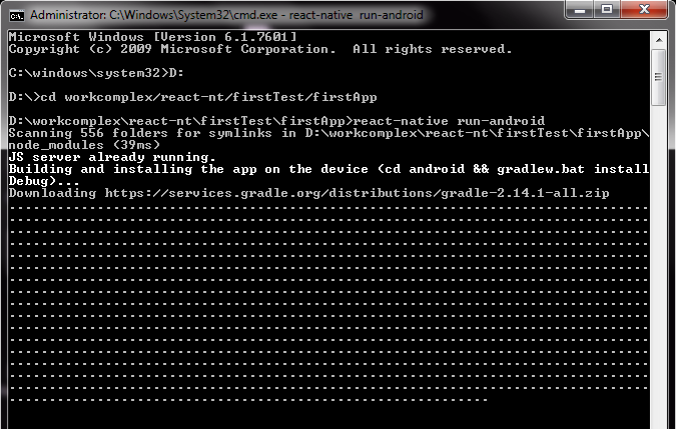
Now, we are ready to compile and pack the sample project, in the prompt, navigate to the project folder, run command:
react-nativestart
That seems to start a service, and btw, you can press CTRL+C to stop it.
Keep it running right there, open another command prompt, navigate to the project directory, run:
react-nativerun-android
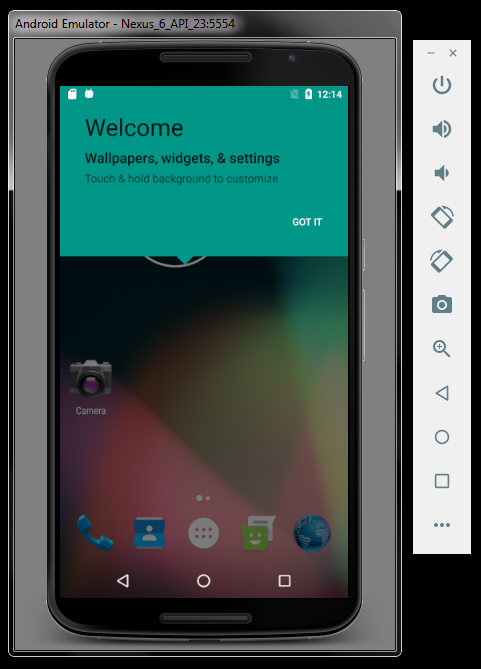
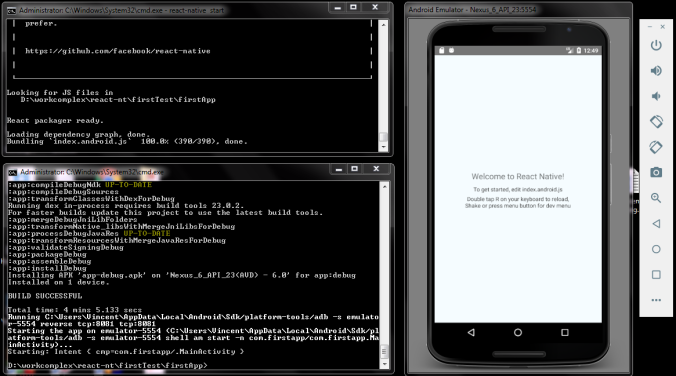
A few minutes later, you should see the sample app loaded and running on the virtual device:
Conclusion
It is actually a boilerplate repo on Git, with the practice that Facebook recommends for React Native development, you can take it as a project template. I reckon it is not the only way to start up a React Native project. Let’s open up the project in VS Code:
Now, you can start working on your own functionalities by modifying this project template.